Introduction
With Fusion Middleware 11g, Oracle has moved from the traditional Apache and OC4J to Oracle weblogic. There are many new things that has come up with weblogic. There is a change in architecture. Changes related to managing the services, deployment procedure, changing of port and many other things.
Well, should we say that it has got better or it got worst ? I am not sure about good or bad, but I know its new. Per my opinion and experience, weblogic provides more flexibility in terms of changing the parameters or making any changes in the existing deployment. Or may be I havent worked much on OC4J or weblogic.
Anyways, this is a short post which explains about a tool called WLST (Weblogic Scripting Tool). WLST framework comes along with weblogic installation and provides a platform to carry out all the task at command line. This is a very useful tool for the people working on weblogic.
WLST Commands
For this post, I have following home
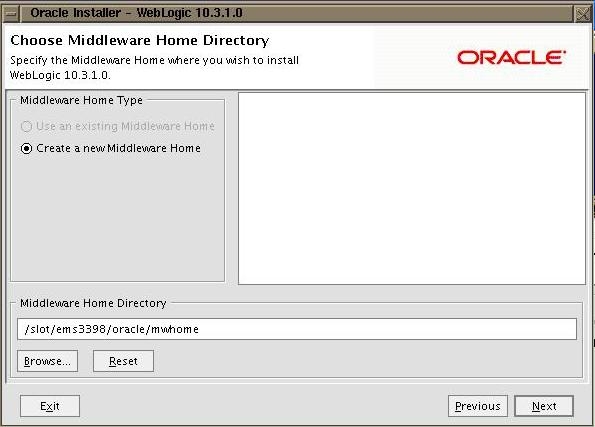
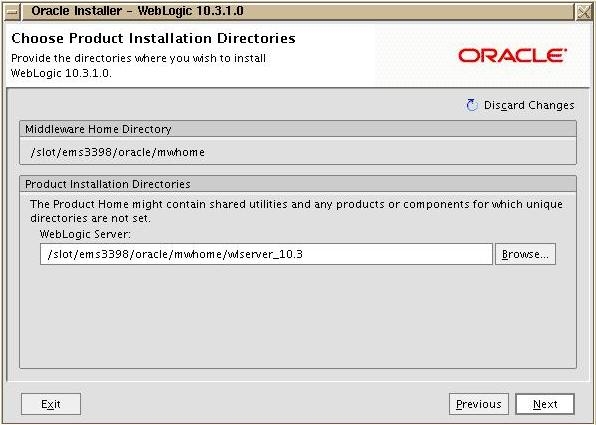
Middleware Home – /slot/ems3398/oracle/mwhome
Weblogic Home – /slot/ems3398/oracle/mwhome/wlserver_10.3
In weblogic we have a concept called domain. Domain is nothing but a project created inside weblogic which will have applications deployed within it. Every domain will have one AdminServer and multiple managed servers. Applications are deployed either on a AdminServer (less recommended) or on managed servers (more recommended).
Domains are created from a template. To begin with weblogic provides some default templates which can be used to create a domain. These templates are nothing but the jar files which has complete file system and services in side it. When a domain is created the jar file is extracted to create the required domain file system and AdminServer for that domain.
The purpose of AdminServer is for administering the services. In case you have managed server for the domain, then you can start and stop manage server only using AdminServer. If your AdminServer is down, then you cannot start or stop Managed servers. However manage servers can remain up and accessible even if AdminServer is down. Each of these servers have there own separate ports.
Default installation of weblogic does not create any domain. We need to create domain manually using the default templates provided by weblogic.
Default template for weblogic will be available at /slot/ems4179/oracle/mwhome/wlserver_10.3/common/templates/domains location
-bash-3.00$ pwd
/slot/ems4179/oracle/mwhome/wlserver_10.3/common/templates/domains
-bash-3.00$ ls -rlt
total 164
-rw-r—– 1 ora4179 ems4179 32510 Jul 28 11:27 wls.jar
-rw-r—– 1 ora4179 ems4179 130456 Jul 28 11:27 wls_starter.jar
You can create domain using this default template (.jar file) using config.sh script present in /slot/ems4179/oracle/mwhome/wlserver_10.3/common/bin location. This script will launch a GUI where all the details can be provided and it will create the required domain.
You can also create the same domain using WLST (Weblogic Scripting Tool). WLST has many commands that helps to get the required configuration. Also the complete domain is visible in WLST as directory and file listing. To connect to WLST framework just run wlst.sh script present in /slot/ems4179/oracle/mwhome/wlserver_10.3/common/bin location
Once you run wlst.sh, you will get the WLS prompt.
wls:/offline>
Creating Default Domain
For creating any domain, you need to first read the required template at WLS prompt and then create domain out of it. The command is readDomain and it takes 1 argument as complete name and location of template.
wls:/offline> readTemplate('/slot/ems4179/oracle/mwhome/wlserver_10.3/common/templates/domains/wls.jar');
wls:/offline/base_domain>ls()
drw-   Security
drw-   Server
-rw-   Active                                        false
-rw-   AdminServerName                               AdminServer
-rw-   AdministrationMBeanAuditingEnabled            false
-rw-   AdministrationPort                            9002
-rw-   AdministrationPortEnabled                     false
-rw-   AdministrationProtocol                        null
-rw-   AutoDeployForSubmodulesEnabled                true
-rw-   ClusterConstraintsEnabled                     false
-rw-   ConfigBackupEnabled                           false
-rw-   ConfigurationAuditType                        null
-rw-   ConfigurationVersion                          10.3.1.0
-rw-   ConsoleContextPath                            console
-rw-   ConsoleEnabled                                true
-rw-   ConsoleExtensionDirectory                     console-ext
-rw-   DomainVersion                                 10.3.1.0
-rw-   GuardianEnabled                               false
-rw-   InternalAppsDeployOnDemandEnabled             true
-rw-   LastModificationTime                          0
-rw-   Name                                          base_domain
-rw-   Notes                                         null
-rw-   OcmEnabled                                    true
-rw-   ProductionModeEnabled                         false
-rw-   RootDirectory                                 null
If you want to list the attributes and services of the template you can use ls() command. The command is same as that of OS command but we need to supply () along with the command. Similarly you can change directory in WLS prompt and go inside the template. Example, I want to set the password for weblogic inside the template, So I can use following command
wls:/offline/base_domain>cd('/Security/base_domain/User/weblogic');
wls:/offline/base_domain/Security/base_domain/User/weblogic>cmo.setPassword('welcome1');
Complete list of all the commands available in WLS is giving in reference section of this post.
Next, after setting the password, you can close the template using closeTemplate(); before creating the domain
wls:/offline/base_domain/Security/base_domain/User/weblogic>closeTemplate();
Next is creating the domain. The command for that is createDomain. It takes 4 argument as shown below
createDomain('/slot/ems4179/oracle/mwhome/wlserver_10.3/common/templates/domains/wls.jar','/slot/ems4179/oracle/mwhome/user_projects/domain/soa_domain1','weblogic','welcome1');
1st Argument is the template name
2nd arguement is the location where the domain is to be created
3rd argument is the weblogic username (which will be weblogic)
4th argument will be the weblogic password
This command is going to extract /slot/ems4179/oracle/mwhome/wlserver_10.3/common/templates/domains/wls.jar file completly and create a directory strucrure under /slot/ems4179/oracle/mwhome/user_projects/domain/soa_domain1
Once the domain is created you can exit the WLST command promt and start the AdminServer using the script shown below
wls:/offline>exit()
Exiting WebLogic Scripting Tool.
-bash-3.00$ cd /slot/ems4179/oracle/mwhome/user_projects/domain/soa_domain1/bin/
-bash-3.00$ ./startWebLogic.sh  &
Start of weblogic server will take some time. Wait until you see the message
<Sep 30, 2009 10:20:09 AM PDT> <Notice> <WebLogicServer> <BEA-000360> <Server started in RUNNING mode>
Once AdminServer is started you can access the weblogic console using http://<hostname>:<port>/console
The default port number will be 7001 unless you change the port number in WLST as shown below
Changing the Default port number
Connect to WLST again and read the domain that you have created just now
wls:/offline> readDomain('/slot/ems4179/oracle/mwhome/user_projects/domain/soa_domain1');
wls:/offline/soa_domain1>cd ('/Server/AdminServer');
wls:/offline/soa_domain1/Server/AdminServer>set('ListenPort',8050);
wls:/offline/soa_domain1/Server/AdminServer>updateDomain()
Once you update the domain with new port 8050, exit the WLST and bounce AdminServer. You can now access the console using new port.
Adding SOA templates to default domain
In the previous post for installing SOA, I showed you the installation procedure for SOA. In those steps we used the GUI for installing the SOA. Here I will show you the steps for installing the SOA using WLST. Basically we can convert our existing default domain into SOA domain by adding SOA template to this domain and changing few attributes of the domains.
The database required for the SOA needs to be installed separately. I have a script for installing SOA using WLST and I will walk you through that script now.
The script looks as shown below
readTemplate('/slot/ems4179/oracle/mwhome/wlserver_10.3/common/templates/domains/wls.jar');
cd('/Security/base_domain/User/weblogic');
cmo.setPassword('welcome1');
closeTemplate();
createDomain('/slot/ems4179/oracle/mwhome/wlserver_10.3/common/templates/domains/wls.jar','/slot/ems4179/oracle/mwhome/user_projects/domain/fmw_domain','weblogic','welcome1');
readDomain('/slot/ems4179/oracle/mwhome/user_projects/domain/fmw_domain');
addTemplate('/slot/ems4179/oracle/mwhome/Oracle_SOA1/common/templates/applications/oracle.soa_template_11.1.1.jar');

addTemplate('/slot/ems4179/oracle/mwhome/Oracle_SOA1/common/templates/applications/oracle.bam_template_11.1.1.jar');

cd('/Servers/AdminServer');
set('ListenPort', 15079);
cd('/Servers/soa_server1');
set('ListenPort', 16079);
cd('/Servers/bam_server1');
set('ListenPort', 17079);
cd('/JDBCSystemResources/BAMDataSource/JdbcResource/BAMDataSource/JDBCDriverParams/NO_NAME_0');
set('URL','jdbc:oracle:thin:@stasa38.us.oracle.com:1600:soaemqa');
cmo.setPasswordEncrypted('welcome1');
cd('/JDBCSystemResources/EDNDataSource/JdbcResource/EDNDataSource/JDBCDriverParams/NO_NAME_0');
set('URL','jdbc:oracle:thin:@stasa38.us.oracle.com:1600:soaemqa');
cmo.setPasswordEncrypted('welcome1');
cd('/JDBCSystemResources/EDNLocalTxDataSource/JdbcResource/EDNLocalTxDataSource/JDBCDriverParams/NO_NAME_0');
set('URL','jdbc:oracle:thin:@stasa38.us.oracle.com:1600:soaemqa');
cmo.setPasswordEncrypted('welcome1');
cd('/JDBCSystemResources/OraSDPMDataSource/JdbcResource/OraSDPMDataSource/JDBCDriverParams/NO_NAME_0');
set('URL','jdbc:oracle:thin:@stasa38.us.oracle.com:1600:soaemqa');
cmo.setPasswordEncrypted('welcome1');
cd('/JDBCSystemResources/SOADataSource/JdbcResource/SOADataSource/JDBCDriverParams/NO_NAME_0');
set('URL','jdbc:oracle:thin:@stasa38.us.oracle.com:1600:soaemqa');
cmo.setPasswordEncrypted('welcome1');
cd('/JDBCSystemResources/SOALocalTxDataSource/JdbcResource/SOALocalTxDataSource/JDBCDriverParams/NO_NAME_0');
set('URL','jdbc:oracle:thin:@stasa38.us.oracle.com:1600:soaemqa');
cmo.setPasswordEncrypted('welcome1');
cd('/JDBCSystemResources/mds-owsm/JdbcResource/mds-owsm/JDBCDriverParams/NO_NAME_0');
set('URL','jdbc:oracle:thin:@stasa38.us.oracle.com:1600:soaemqa');
cmo.setPasswordEncrypted('welcome1');
cd('/JDBCSystemResources/mds-soa/JdbcResource/mds-soa/JDBCDriverParams/NO_NAME_0');
set('URL','jdbc:oracle:thin:@stasa38.us.oracle.com:1600:soaemqa');
cmo.setPasswordEncrypted('welcome1');
updateDomain();
exit();
The first 5 steps are same as we saw above. Next step is to read the domain and add SOA & BAM template to it. SOA template will come along with SOA installation.
After adding these templates, it will automatically create ManagedServers in the domain.
Next we are just navigating to the folders and changing the ports for AdminServer and each of the ManagedSever
SOA and BAM uses datasources for connecting to database, so we have to navigate to the corresponding datasource folders and update the JDBC connection, userID and passwords.
Once all this is done, update the domain and your SOA installation is ready. You can bounce the AdminServer and start ManagedServers.
References
WLST Command Reference : http://download.oracle.com/docs/cd/E12840_01/wls/docs103/config_scripting/reference.html
Hope this helps !!
